
Food: DIY Basics, Part 3, by Robert Fuller
If you’ve made it this far in DIY Basics, then you’re probably aware that Part 1 mainly covers equipment, and Part 2 goes into a fairly comprehensive tour of the wonderful world of ingredients—and gets you started thinking about new and inspired ways to combine them.
This part of DIY Basics is for the purpose of giving you a few quick-n-easy recipe ideas, which you are of course free to expand upon. They are limited in the number of ingredients used as well as the prep time, and even the necessity to apply heat to the ingredient mix. Yes, it’s true. You can make delicious dishes and snacks without even doing any actual cooking.
I’ve been pleasantly surprised just recently at how simple it is to throw together just a handful of ingredients, and then, voilà! You get the most pleasant massaging of your taste buds!
This part of DIY will hopefully also give you ideas about how you can incrementally expand on your successes in your new passion of creating exciting and mouthwatering comestibles. And it’s you yourself who will bring the winning touches to your most recent tours de force in your brief yet savory epicurean ventures of late.
Blueberry Bounty Times Two
Two fairly simple sweet & savory recipes inspired by those berries in blue. The first was one I threw together with some ingredients on hand. The second was a variant on the whole blueberry theme.
Here’s the first:
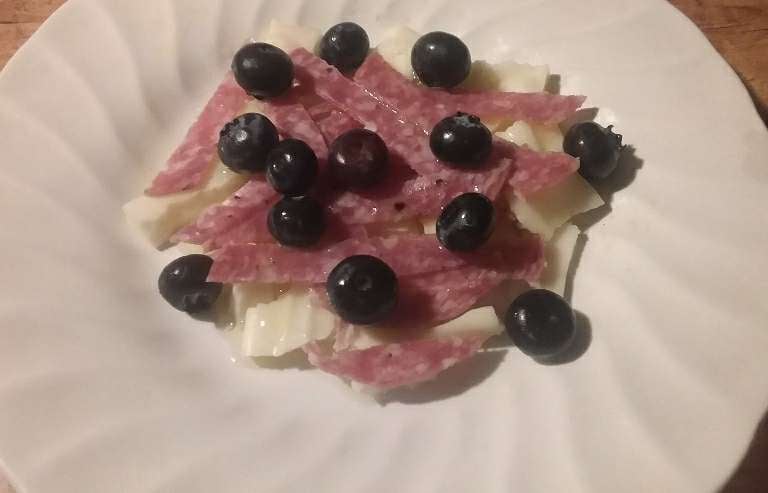
For the original version of this dish, I used fresh mozzarella, which I highly recommend. The version you see pictured was made with regular (“brick”) mozzarella. Fresh mozzarella is lighter in color, softer, and more moist.
Chunks of mozzarella (fresh or regular), or other soft or semi-soft cheese of choice, such as goat cheese
Two slices of thin salami, cut into thin strips
Blueberries (a handful or so)
Extra virgin olive oil
Arrange the chunks of cheese on a small to medium plate. Add the salami strips, then the blueberries. Drizzle with olive oil to taste. That’s it!
I suggest tasting various combinations of the four ingredients, just for fun.
Here’s the second dish, which has quite a different flavor, mostly because of the smoked salmon and the shredded cabbage:
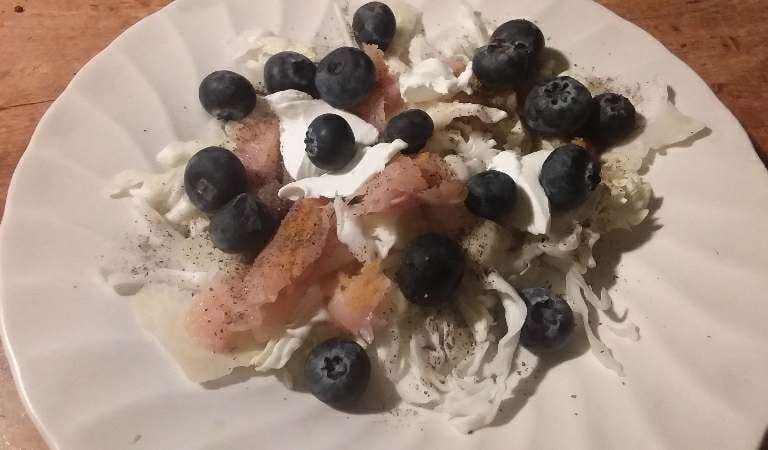
The smoked salmon is always a taste treat—unless that’s not your thing, in which case you’re forgiven. The shredded cabbage (raw) is actually very healthy for you, and it adds that extra texture. And if you think about it, this dish is like a bagel with lox and cream cheese—sans bagel.
Shredded cabbage (raw), enough to cover your plate of choice, as the bed of the salad-like dish
Smoked salmon, cut into chunks
Black pepper
Turmeric powder
Chunks of cream cheese
Blueberries
Arrange the shredded cabbage to cover the bed of your plate of choice. Add the chunks of smoked salmon, spread evenly. Add a sprinkling of the black pepper and a light dusting of the turmeric powder, then distribute the cream cheese chunks and the blueberries.
My email notes after the fact to friends say that this dish could possibly use a splash of olive oil and balsamic vinegar, but you just try it for yourself and be the judge. Your opinion? (It’s on me!)
And the new (as of 2/3/2024) “Recipes” section starts with a “blueberry bang”: Smoked Salmon Blueberry Salad!
“Tortizza” Temptations
Naturally you're wondering what a “tortizza” is, aren’t you? Well, if you think about it, it’s basically just a “pizza” using a tortilla as the crust. Even though there’s only a single recipe in this section, I took the liberty of using the plural form of “temptation” because I’ll be supplying you, free of charge, a few other “tortizza” ideas. (Is that even a thing!? I think it is now. You use your own best judgment.) Here’s the scoop, for each “tortizza”:
One 6-8” corn tortilla (or flour, if you prefer)
Enough cheese of choice (the version below is a soft goat cheese; I originally used red wine-infused cheese)
Garlic powder, black pepper, and powdered ginger
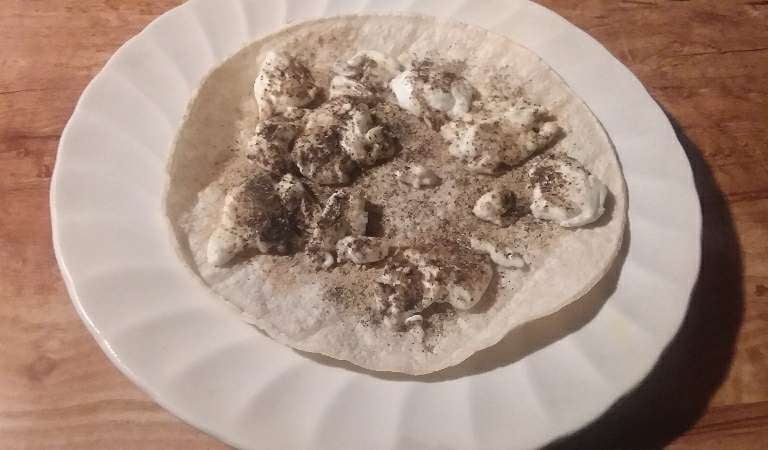
The most basic version of the “tortizza” is just the tortilla with cheese of your choice covering it fairly uniformly. You can experiment with many different types of cheese, without using any other ingredients, and you’re sure to have lots of good, clean, wholesome “tortizza” fun and excitement.
First place the tortilla on a sheet of tin foil. For the version pictured above, add the chunks of cheese, then the garlic powder, black pepper, and powdered ginger to taste. Then carefully place it into the toaster oven.
And for these basic versions of the “tortizza”, using just cheese, with or without dry herbs & spices, all you have to do is set your Hamilton Beach toaster oven to the “toast” setting, crank the dial to 350°F, set the timer to 5 minutes, and let it do its magic.
If after that your “tortizza” isn't quite done to your satisfaction yet, toast it for a few more minutes. Different types of cheese might brown at different rates, so just do the toasting to the desired degree of melting or browning of the cheese.
When you’re ready to graduate to the next level of Tortizza University, there are a few things you might want to know.
One of them is that if you add various other non-cheese, non-tortilla ingredients, such as olive oil, various veggies, or other ingredients that are to some extent liquid, you will have to make a few adjustments.
If you want to humor me with a quick experiment, take a tortilla and spread olive oil or melted butter evenly on all of its surface, and then try toasting it without any cheese, at the same temperature and time settings already given. That should give you a semi-crisp and semi-oily tortilla.
So you can add your oil of choice to the tortilla before you add the other basics, and you can toast it all in one 5-minute session.
Or alternatively, you could first toast the tortilla with just the oil coating, but at a lower temperature, say, 250-275°F.
If you decide to add veggies or other ingredients not yet covered, you could do another 5-minute session after adding those (non-cheese) items, also at the lower temperature.
Then the final round would be after you add the cheese and any dried herbs or spices, with another five minutes or so at 350°F, or until the cheese is melted or browned to your satisfaction.
If you try these advanced Tortizza U experiments with some of your favorite toppings, including even a touch of tomato sauce, you might well agree with me that you have achieved a profound state of “tortizza” Nirvana.
Irresistible Insta-candy
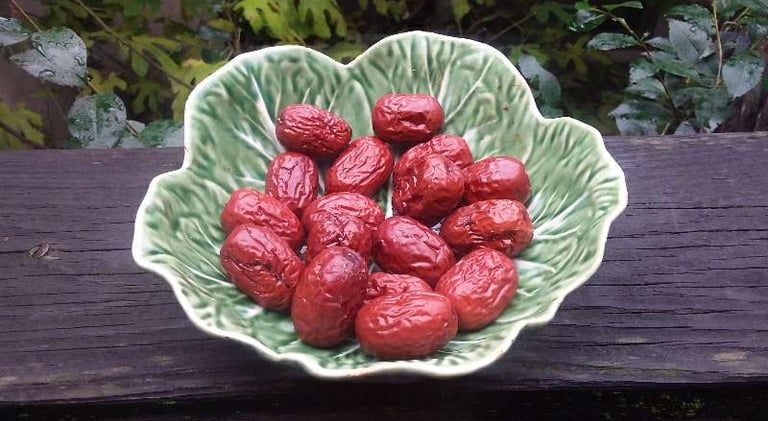
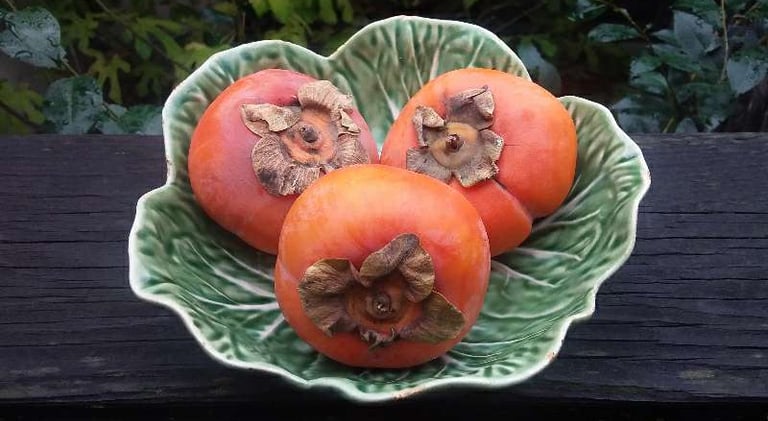
Above: Dried jujube dates, then fresh persimmons. (Hey, who's making that face!?)
Insta-candy Initiation
The basic principle of insta-candy is that you start with an awesome fruit, either dried or fresh, and you saute it in butter at an appropriate temperature for an appropriate amount of time.
Both time and temp are governed by two main factors: (1) whether the fruit is dried or fresh; and (2) most importantly, once you’ve sauteed it for a while, whether it's caramelized sufficiently or not.
Without further ado, then, here are the stars of our show:
Jazzy Jujube Double Date
My Jujube date, she was the first, and as such, as you all know, unforgettable. She was all, you know, “Lola gets what Lola wants”—and who was I to argue with that logic?
She had that charm that just couldn’t be overlooked, the kind that will get you no matter what you try to do.
When it came time to unveil her, by mistake I ended up tearing her carmine dress into small pieces, and she didn’t even flinch!
But all I got in the middle was a pit, which may have been in my stomach.
Anyway! What was I saying!?
Back from Broadway tune-induced fantasy land, but what I just said...
I strongly suggest tasting the dried jujube date (if you haven’t already) before you make yourself (and the millions of loyal followers you have on Instagram) some insta-candy of the Jazzy Jujube Double Date ilk or demeanor.
After all, you have to know what you're getting yourself into, n’est-ce pas?
Basic Foodie Principle 101: Taste! As in taste each ingredient on its own before you do anything else.
Once you’ve done your solemnly sworn duty, you need to get out your small saucepan along with a tablespoon or so of butter.
But first, you need to undress those pits in the middle of the jujube dates, by tearing those carmine dresses into somewhat manageable pieces.
Then you’re going to fire up your pan with that butter, at low to medium heat, until it’s melted sufficiently.
Once it’s ready to go, thrown in your dried jujube date pieces, and start monitoring their progress towards the magical land of insta-candy. You can alternate between medium and low heat as needed. You might also want to swirl the pan around to evenly distribute the heat.
At some point, it will be clear to you that you should flip the jujube pieces so as to saute them evenly on both sides.
The inner parts of the jujube date pieces are the ones that are going to most obviously caramelize, and they’ll start to become a dark carmine. The skin or rind (the outer part of the dress) will not show as obvious signs of caramelization.
Once you’re convinced the inner parts have caramelized enough, it’s time to shut off the heat and put a lid on it. (The lid goes on top of the saucepan, okay!?)
Any caramelization that’s been started will continue for a while, even while your insta-candy is cooling down. And when it’s finished cooling down, it’s very likely the caramelization will have finished working its magic.
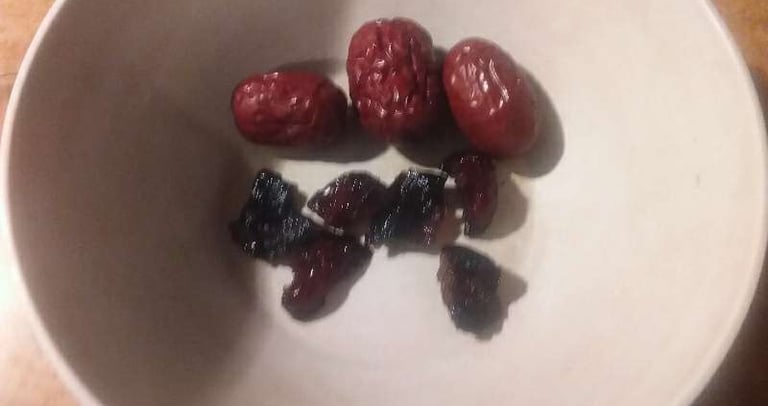
As a comparison of the original and the new insta-candy, check this out:
Perfect Persimmon
When you’re working with a fresh fruit such as the persimmon, the sauteing is a bit different than with dried fruits.
First you’re going to cut the persimmon into 1-centimeter squares (with the height a bit less, maybe ½ centimeter or so), so that the pieces are a nice candy size.
Then you’ll melt about a tablespoon of butter in your saucepan at medium heat, and when it’s melted, put enough of the persimmon pieces in the pan to cover the bottom.
Here’s where the process is slightly different. Use primarily high heat to saute the persimmon pieces (since you’re using fresh fruit) and swirl the pan around every now and then to prevent them from sticking to the pan.
Starting with fresh fruit, you have to use your best judgment as to when it's time to stop sauteing, but you should wait until the persimmon pieces start browning at least a little. You’re most likely fine, just as long as they don’t turn too dark a shade of brown.
The key is that, after you turn off the heat and cover the saucepan, and you let your persimmon pieces cool their heels for a while, the caramelization process will still continue for a while as they cool down even further.
You can taste them even before they’ve cooled down much or at all; if you try them later on once they’ve cooled down all the way, you should notice that they've caramelized quite nicely.
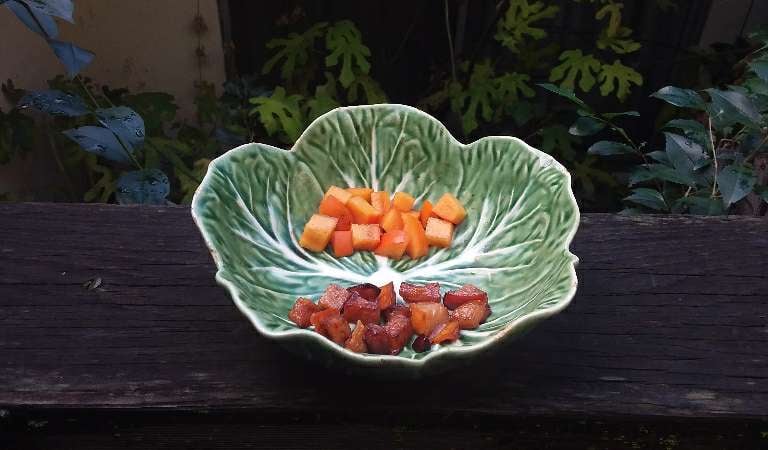
Here’s a direct comparison of the original pieces with the ones that have had that magic worked on them:
Peculiar Pineapple
Unlike the dried jujube dates, dried pineapple rings are a bit more delicate, a bit more of a challenge to work with. But that’s not going to stop you, is it? After all, as my older brother says, “How hard can it be?"
As with anything else, you have to put the work in at the beginning, and then after that, everything’s easy. Or at least easier.
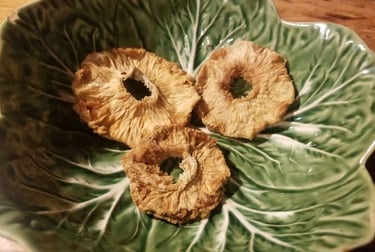
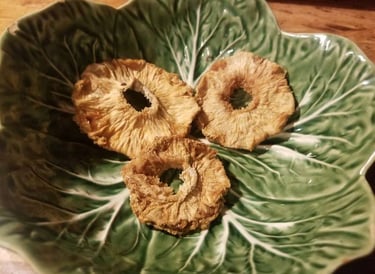
Once you’ve got your package of dried pineapple rings opened and ready for action, my first suggestion is to choose the ones that are lighter in color; after all, we're going to be caramelizing them by adding butter and heat, so that’s already a sure recipe for darkening them at least somewhat. You should then cut or tear the rings into nice little insta-candy-sized pieces, enough of them to cover the bottom of your saucepan.
Now, part of the trick in sauteing these dried pineapple ring pieces is that you’re going to want to saute them at a relatively low heat. What I would suggest doing with your roughly one tablespoon of butter is to start it melting at medium or high heat, swirl it around the pan, and before it’s completely melted, switch the heat to low, and start adding your dried pineapple pieces, arranging them in a single layer.
You should mostly use low heat, and swirl them around every now and then, or use a utensil to move them around, and then occasionally crank the heat up to medium to get a little sizzling going, returning the heat to low once that happens.
And you should also monitor the darkness and the general color, because you want them to be just the color that for you is picture perfect.
The fun part, of course, as with anything you cook, is that you should taste a sample—no, not the whole pot!—every now and then to make sure the texture and taste (including caramelization) are to your satisfaction. As with any of these insta-candies, you also want to make sure that they don't harden too much.
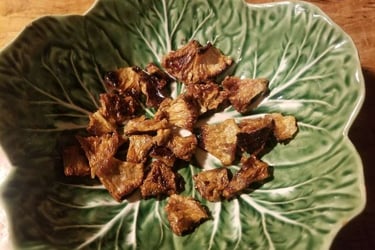
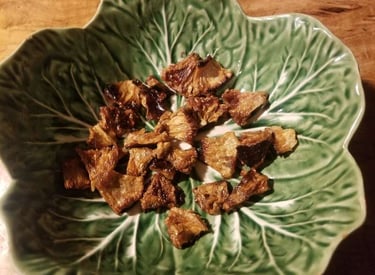
Keep in mind that the cooking continues after you turn the heat off and cover the saucepan with a lid, and that the caramelization process continues quite a while after that. So then, after a sufficient period of time, maybe at least half an hour to an hour, you get to sample the results again. If they’ve turned out too hard, there are ways to soften them (with water and heat, probably in a covered dish in the oven), and if they're not quite done enough, you can repeat what you’ve already done until they are.
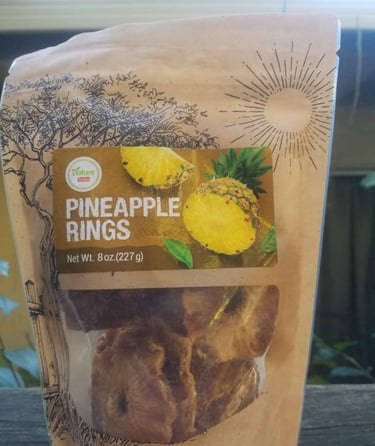
Here’s the before and after mugshots for your perusal:
Fortuitous Fig
Like the dried pineapple rings, the dried figs are also a bit more of a challenge to work with. But it’s not for the same reason, at least not as far as I can tell. I think in the case of the dried kalamata figs I got, it’s more that they’re quite thick, and they’re already pretty hard and chewy.
So whereas my first try at these turned out edible enough, I’m thinking that the method I used could be suitably altered, possibly to good effect.
I basically cut each dried fig into about 2 to 6 or so pieces, depending on the size of the uncut fig. But each piece was still fairly thick, making it a bit more difficult to achieve the desired results.
My new line of thought, then, is that maybe I should try cutting each fig into pieces that are quite a bit thinner, like those pineapple rings...
I’ve just taken my own advice, and as I write this, the experiment is still midstream, but I’ve already tasted the results at this stage, and, Yes! That was the key!
That’s what’s interesting about being an amateur who’s not afraid to experiment a bit, and then writing about it so that others can learn: We're learning together, my friend!
And one of your most important takeaways of what you’re reading right now is that the art & science of working with food is always a learning process! It's like anything else: Once you think you’ve arrived, you’ve forgotten about the journey.
Yet, you know, it’s not like the caramelization achieved in the first attempt wasn’t good; it was actually quite good, to be sure. At the same time, for the reasons mentioned, I realized how it might be possible to make it better.
Here’s the original dried figs and the first attempt at insta-candy:
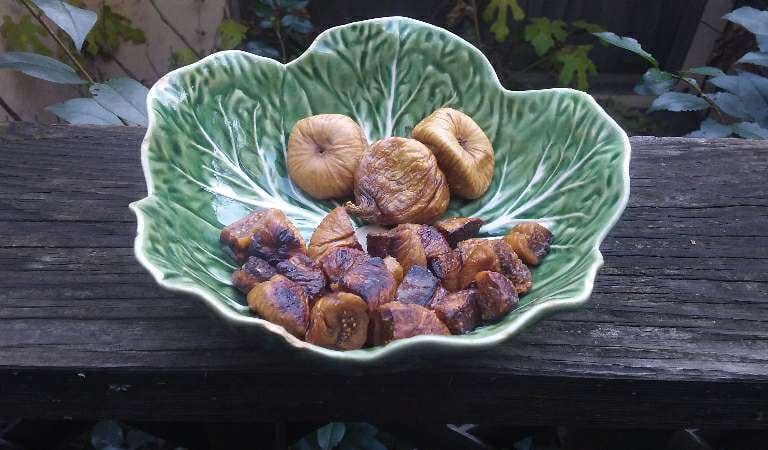
The second attempt, with the figs sliced more thinly, turned out much like the first attempt, flavor-wise, but the process was quite a bit easier and quicker this time around.
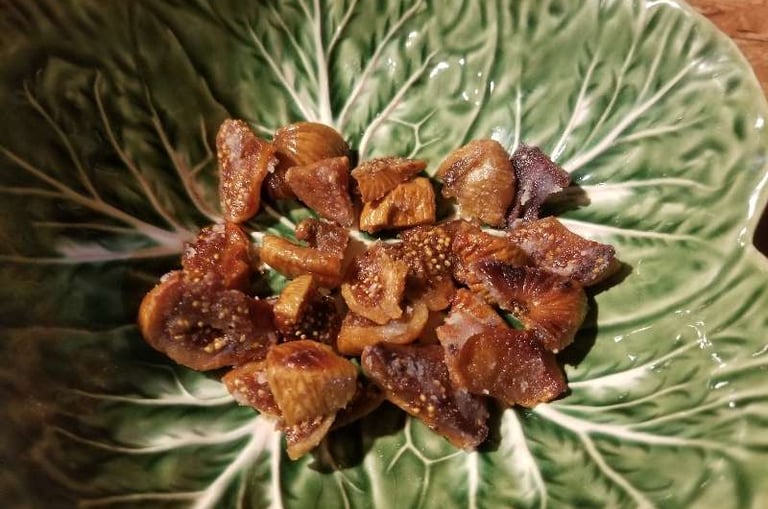
Basically, the sauteing was done mostly at medium heat, with occasional swirling of the saucepan contents. It's my assessment that, after using medium heat for long enough to get the figs to sizzle a bit, it might be prudent to set the heat lower, allowing the caramelization process to extend over a longer period of time.
Here's how the second batch came out:
Another line of thought that occured to me is the idea of adding just a splash of balsamic vinegar to the process.
You see, balsamic vinegar has a natural touch of sweetness, and it’s also obviously liquid, and it could help soften the insta-candies a tad.
Now, here’s where you put your chef’s thinking cap on. There are at least two major ways that I can think of off the top of my head regarding how to use the balsamic vinegar in this kind of scenario.
Let’s say for the sake of argument you've decided on the thin pieces—although you could use the thicker pieces just as well, if you like. One way you could use the balsamic would be to soak—marinate—the fig pieces in a small amount of vinegar before you do the sauteing. It should be enough to cover the whole batch, and you can mix it in real nicely just to be sure that all the pieces get soaked at least a little bit.
Your next chef’s thinking cap question, then, is “How long should I marinate these fig pieces?” A good rule of thumb would be about 30-60 minutes, although you could consider soaking them overnight. This marination thing, you see, is a chemical process, which means that the fig and vinegar chemicals interact with each other, altering the chemical makeup (no, not lip gloss!) of the whole. (Yes, Virginia, the whole is greater than the sum of its parts!)
And when you’re talking about chemical reactions, time is definitely a factor, at least in certain situations.
And so there’s another puzzle piece to your chef's hat inner workings, and it’s a major key to the unlocking of your inner chef.
The secret is simple: Just experiment! So your homework is to try at least two or three marination times for the thin fig pieces; perhaps 30 minutes, 60 minutes, and overnight. Or whatever other timings you'd like to try. After all, you’re the chef! I’m just putting a few thoughts in your head, like a little bird that told you something.
The other (fairly obvious, I think) thing you could do with the balsamic vinegar is to find an opportune time during the sauteing process to add just a few little splashes of it. But the temperature at which you add the vinegar will have an effect on the results. (Hint: I would try it first at low heat.)
You might even try combining both options mentioned. If you do, I would use a little less balsamic in each step.
I took my own advice again (option 2, adding balsamic during the sauteing process), with the following results:
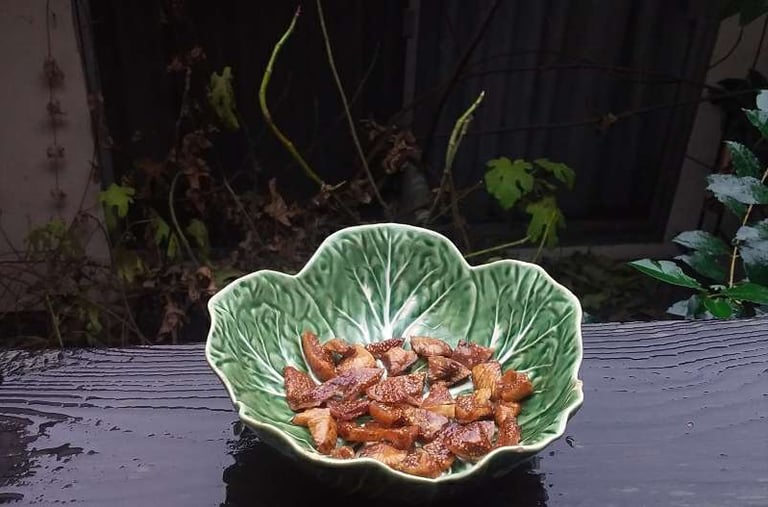
Holy fig leaf! (That sounds like The Boy Wonder...) 🦇
I call this celestial treat Balsamic Bob’s Fortuitous Fig.
So what I did was I worked with the thinly sliced dried kalamata figs, started sauteing them at low heat in butter, cranked the heat up to medium until they started sizzling a tad, and then added half a capful of balsamic vinegar, mostly sauteing at low heat, for really just a few minutes. I tried one piece while they were still sauteing—but after they’d already been going for a couple minutes—and Wow! The color changes slightly, and the flavor is definitely enhanced!
You have to keep in mind that not only is the combination of heat, figs, and balsamic a chemical process, but it’s also a bio-chemical process. Balsamic vinegar is one of those ferments I discussed in quite a bit of detail in the “Roasting” article, as you recall, if you read it (you did, didn’t you!? There will be a pop quiz on it tomorrow!).
Not only, then, is there a chemical reaction going on when you use ferments such as balsamic vinegar, but there are all kinds of health benefits that come with their use, in part because the fermentation process makes use of beneficial bacteria, and in part because of the enzymes that occur in fermented foods, helping to break down more complex molecules into simpler ones more easily assimilated by the body, thus increasing the nutrients available to you.
Now here’s a secret, just for your lonesome, so that we can giftwrap this article up nicely in a lovely bowtie: What I’m really doing in pretty much all of these "Food" articles is revealing the thinking and learning process to you; I'm getting you to think like a chef (call it amateur chef, if you like; that just means you love it!). And you're going to love it! Or else!
And all the while, guess who else is learning a little something something: Lil’ ol’ yours truly!
Are we having fun yet, or what!? I thought so 🤔...
Killer Kiwi
In retrospect, these seemed the easiest to work with, except, perhaps, for the Jazzy Jujube Double Date items.
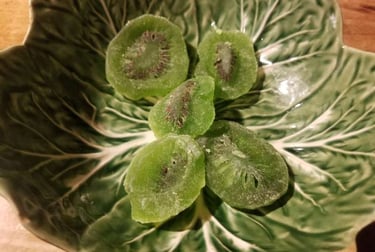
I didn’t read the label all that carefully when I purchased the dried kiwi, so I didn’t notice until I got home that they weren’t as pure as I might have liked. Yet, they’re still quite tasty, and the process of sauteing them was pretty straightforward.
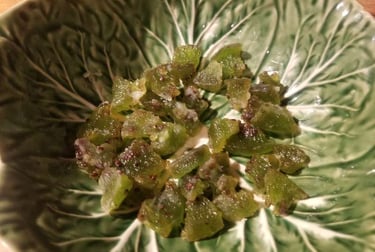
You can follow much the same guidelines as with the jujubes. Just keep a low to medium heat, in general; sample the results every now and then; and don’t let them brown too much.
As with the dried pineapple, the dried kiwi I got was fairly thinly sliced. So all you need to do before doing the butter sauteing is to cut the slices up into smaller pieces, and then follow the directions pretty much as for the jujubes.
Now that I’m aware of the variations in quality when it comes to dried kiwi, next time I’ll try something more pure, like this. It's bellaviva; note their very nice selection of other dried fruits lower down on the page. Dried cantaloupe, for instance.
As for the present iteration of Killer Kiwi, here’s what happened:
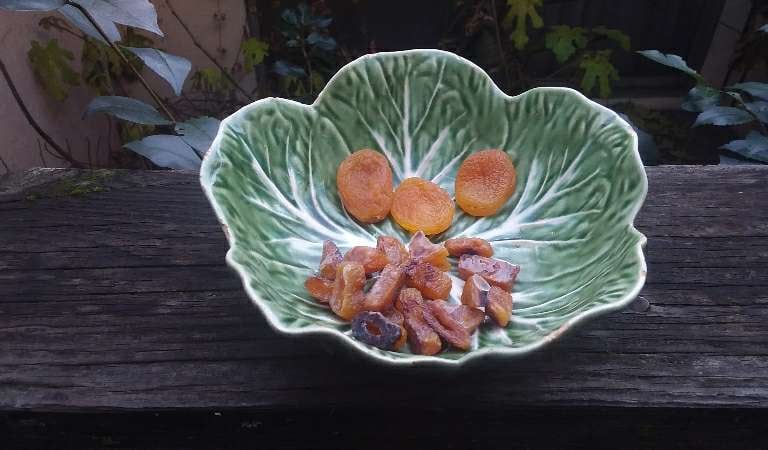
Apricot Appeal
With dried apricots, the modus operandi is much the same as with the dried jujube dates or the dried pineapple rings. And the M.O. should have become clearer after the “Fortuitous Fig” debriefing you should have already received a memo about.
Dried apricots and dried kalamata figs should probably be handled in roughly the same way when preparing those absolutely luscious insta-candies from either fruit. They should be thinly sliced, so as to maximize surface area, and the time and temp considerations mentioned re the dried kalamata figs should be followed, always with the same disclaimer, that you and only you are the judge and final arbiter of how these fruity creations of yours turn out.
So please refer to the first batch of notes that I call “Fortuitous Fig” in order to see how to proceed. Truthfully, though, I have not as yet tried adding balsamic vinegar to the sauteing process for Apricot Appeal. Maybe you'll be the first?
In any case, here's how these yummies turned out first time around:
Finale: Piquant Pinnacle (“Secret Sauce”)
Now you’re not going to believe this, but a little while ago, I discovered a shortcut stairway to Insta-candy Heaven.
It’s full of seedy and fruity characters, and chock full of delicious goodness that will warm your heart.
But you haven’t (have you!?) looked ahead in this textbook “Food" menu to see how the seedy characters get roasted. Have you!? I’m talking about The Art & Science of Roasting Seeds & Nuts, right here in this very online neighborhood affectionately known as The Fuller Zone.
If you’ve already done the advanced exercises relating to air-roasting a number of different types of seeds, and then combining them into a delicious mix, you should be ready for this next step.
In the event that you haven’t yet exercised those particular culinary faculties as given herein in the context of The Fuller Zone, then it’s high time you get off your duff and do just that! Seriously, though, this section of the “Food” menu is Part 3 of DIY Basics, yet I already have you jumping through so many hoops you’ve gotten dizzy!
So please check out at least the basics of roasting seeds & nuts. Once you’ve got a nice batch ready to go, then you're all set to ascend the shortcut stairway to Insta-candy Heaven! Ready, set, Go!
Okay, so I already knew how scrumptious my prototypical roasted seed mix could be. And it’s fabulous on its own. But what really grabbed my attention earlier today was when I was so audacious as to add various varieties of these soon to be world famous Insta-candies to some of the roasted seed mix.
The original impetus for this idea, this experiment, was another related idea, which had to do with a notion of mine that some of these really sticky dried fruits might well be easily able to sport a roasted sesame seed coating, to good effect. (You might want to start your foray into air-roasting seeds with precisely that: (open) sesame! Be sure to follow the guidelines carefully, since sesame seeds are rather small and delicate, and can tend to brown pretty quickly.)
Well, I’m all for shortcuts, if done for the right reasons, so then my mind turned to that roasted seed mix just sitting there all forlorn in my kitchen, and I said, “Eureka!” ... ... ... Well, I didn't really say that, but it's still true.
The aforementioned roasted seed mix, you see, has plenty of roasted sesame seeds contained therein. So why not introduce the Roasted Seeds to the Insta-candies!? And it was love at first bite!
No, this isn't some kind of Grade-B or worse Dracula redux! We’re talking taste, really good taste, and plenty of it!
When you combine such disparate flavors, textures, and crunchiness factors (including lack of any crunchiness), you might end up with something that, frankly, sucks, or you might end up with a new culinary treat the likes of which has never yet been experienced.
Well, spoiler alert: The present treat that I’m talking about is in the latter category.
How to describe it... I’ll have to put together a fresh batch and get back to you momentarily...
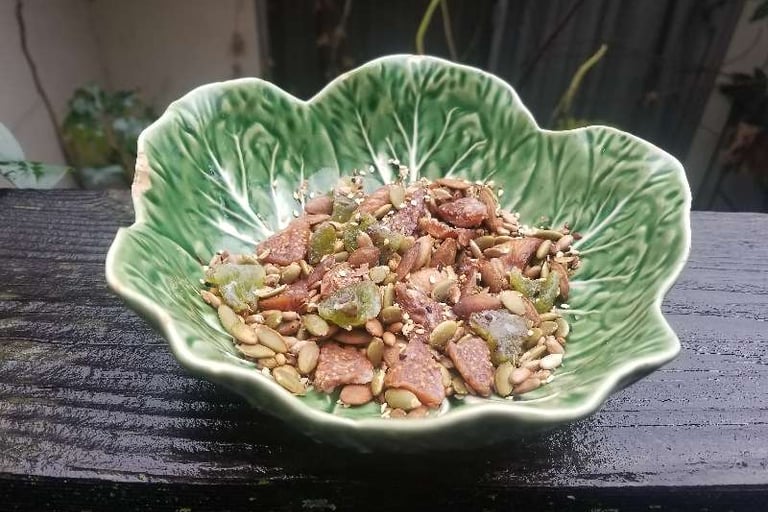
Well, it’s a salty, slightly buttery, crunchy, gooey, mouthful of roasted seed bliss, with occasional hints of licorice and cumin, accompanied by plenty of bursts of kiwi and balsamic figs. Each mouthful is a new experience, which is the way I like my culinary experience to be, at least on occasion. And this is such an occasion, being that I’m sharing this with someone as important as yourself.
Piquant Pinnacle (“Secret Sauce”) has at least the following roasted seeds in it:
0.5 oz butter-fried, in-shell pumpkin seeds
0.5 oz butter-fried, in-shell squash seeds
1.0 oz air-roasted pumpkin seeds, no shell
1.0 oz air-roasted sunflower seeds, no shell
Fenugreek
Cumin
Fennel
Anise
Flax
(Green) coriander
Sesame
And, as already mentioned, it features Killer Kiwi and Balsamic Bob’s Fortuitous Fig.
The last seven of the roasted seeds listed were in relatively small amounts. There may have been one or two other types of roasted seeds that I added after the fact.
Here’s what this version of Piquant Pinnacle (“Secret Sauce”) ended up looking like:
Now that you’ve had a chance to explore the magical world of insta-candy, it’s time to remind you about the numerous other possibilities that exist in this arena.
I refer you back to the “Roasting” article, especially the part that talks about the many add-ons you can use when you air-roast seeds & nuts.
Just remember: The possibilities are endless! Give your tastebuds a workout. They’ll thank you profusely!
Pinto Bean Egg Salad
→
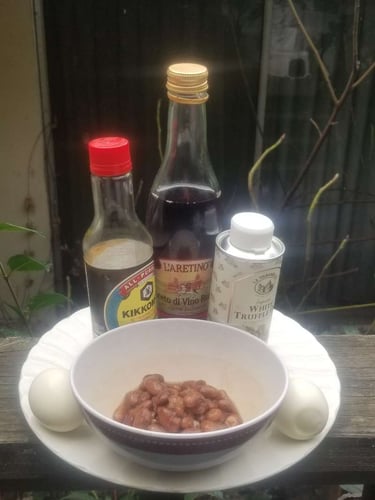
Although this recipe does involve just a wee bit of cooking, as in heat application to selected ingredients, the actual prep time is pretty minimal. And you can do the two stovetop cooking parts at the same time, just as long as you have two burners available.
First things first. The ingredients for the basic version of this dish are as follows:
2 medium-to-large eggs
Pinto beans, dry
Soy sauce
Red wine vinegar
(Optional, but highly recommended) White truffle-infused sunflower oil
Weight-wise, the cooked, peeled eggs should be about the same as the cooked pinto beans. (I used large eggs, which weighed in at about 3.5 oz total, so I used the same amount of pinto beans.) For the soy sauce and vinegar, it’s about a couple of capfuls each (or to taste). The truffle oil can be a tad pricy, so for that, it’s a modest or not so modest drizzling.
It’s not strictly speaking necessary, but with the dry pinto beans (or other varieties), you may wish to soak them for an hour or two prior to cooking them. If you do, you can expedite the soaking by first bringing them to a boil, taking them off the heat, and then covering the pan. (You may wish to add salt to the water first.)
If you’ve opted for soaking the beans, after they’re done soaking, drain the liquid (and reuse it for something else, if you like), and then add an appropriate amount of water for the actual cooking, with a sprinkling of salt, if you wish. (In either case, add the water and optional salt, obviously.)
You can usually find the recommended amount of water and cooking time on the package, but a good rule of thumb for beans such as pintos would be about twice as much water (height- or volume-wise) as beans, and roughly 30 minutes cooking time at low to medium heat. It would be advisable to check how your friends are doing after about 15 minutes, stirring as required.
While your pinto beans are cooking, you can also be cooking the eggs. My usual preference these days is steaming them, which is handy if you have a steamer basket, since you can steam them (at roughly medium heat, just as long as you have enough water in the pan used for steaming) and not really worry about overcooking them, if you time them with the pinto beans. If you prefer hard-boiling or hard-cooking (same as hard-boiling, except that you turn off the heat and cover the pan once the water is at a boil) your eggs, the basic rule of thumb is about 12-15 minutes in either case.
With the eggs, after they’re done steaming or boiling or cooking, take them out of the steamer basket or the water with a spoon and place them in a bowl to cool off. Likewise, when the beans are done cooking—taste them, please!—let them cool down to room temperature. When the eggs have cooled down sufficiently, peel them and cut them into small cubes.
In a medium bowl, place your pinto beans and then your little cubes of egg, and stir them together.
Now, this next step, after you’ve added two capfuls each of soy sauce and red wine vinegar, and you’ve stirred all that delicious umami into everything else, is optional, and may or may not be necessary. (It’s probably not necessary at all, so the only real question is that of whether it adds anything of value to your dish, flavor-wise.) The step I’m talking about is to let these four ingredients marinate for 30-60 minutes, or even overnight. Play around with it, if you like.
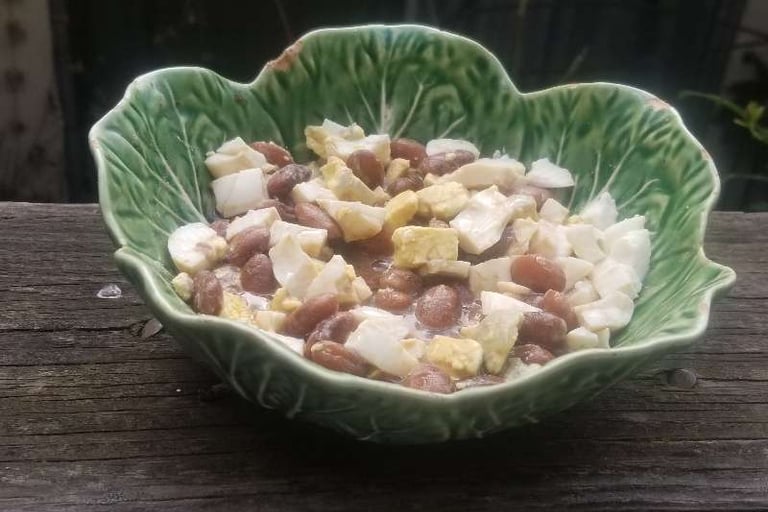
Whether you opt for the optional step or not, the final touch is to find your favorite bowl, scoop out a nice portion of your Pinto Bean Egg Salad, and then drizzle your preferred amount of white truffle oil over it, making sure to stir.
Then all you have to do is to luxuriate in this wonderful and surprisingly simple culinary treat. (But please read what follows first!)
In the spirit of my way of presenting food-related endeavors here on The Fuller Zone, the bonus treat to follow is a bit of edutainment, where we hopefully learn something together. In order for you to participate in this activity, after you’ve made this fabulous treat, you should make a point of keeping a good portion—about half or more of what you’ve just made—so that you can explore the enchanting world of the incremental addition of ingredients to a dish that you’re already familiar with.
You are free to use your imagination to figure out which additional ingredients you’d like to add one at a time, and how many you’d like to add, so this next section is merely a suggestion of what the possibilities are.
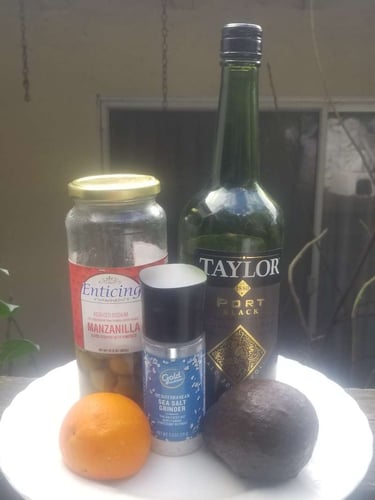
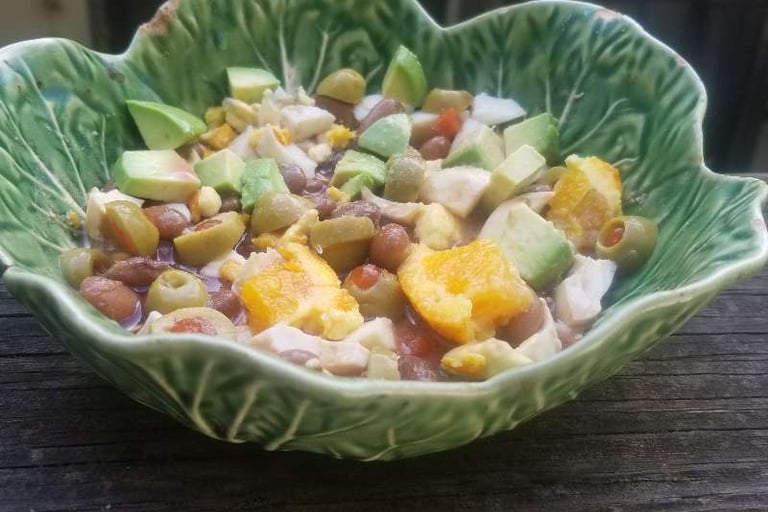
Let’s start with my chosen cast of characters and the final production:
→
Part of the purpose of this exercise is to get you even more attuned to the possibilities of combining ingredients. If you are relatively new to this type of exercise, you might want to consider multiple iterations of it, preferably using the same starting point, namely, the Pinto Bean Egg Salad you’ve just made. If you do that, you may want to make an extra batch or two, and invite some close friends over to share the love.
If you do elect to repeat this exercise, there are at least two basic ways to do it: (1) use the same “extras”, but add them (and taste the results) in a different order each time; (2) use a slightly or completely different set of “extras”. The point in each step of the tasting process, especially in comparison to previous iterations of the exercise, is to notice how the original salad mix is affected depending on which ingredients you add and in which order.
Now that you have an overview of how this exercise and its reiterations work, here’s the six steps I used in adding those “extras” to the salad:
A sprinkling of sea salt
The zest (grated peel) of a tangerine or small orange
A half dozen or so pieces of the flesh of the same citrus
A half dozen or so Manzanilla olives, cut in pieces
About ¼ avocado (ripe yet firm), cubed
A couple capfuls of port wine
This exercise can be a bit tricky, since part of what you want to focus on at each juncture is the proportions of the various ingredients. The tricky part is that each time you taste the new results, you remove some of the ingredients you’ve just added, which means that you may need to add more, of one or more of the existing ingredients, after each taste.
But if you pursue it in the right spirit, with a good group of friends, it can be an eye-opening experience for all. And your tastebuds will love you for it!